
sshを有効にし、ssh接続を行います。
本記事では接続先にラズベリーパイ(ラズパイOS)を使用します。
※GUIでもssh設定を有効化できます。
ラズベリーパイ側作業
ターミナルを起動し、下記コマンドを実行
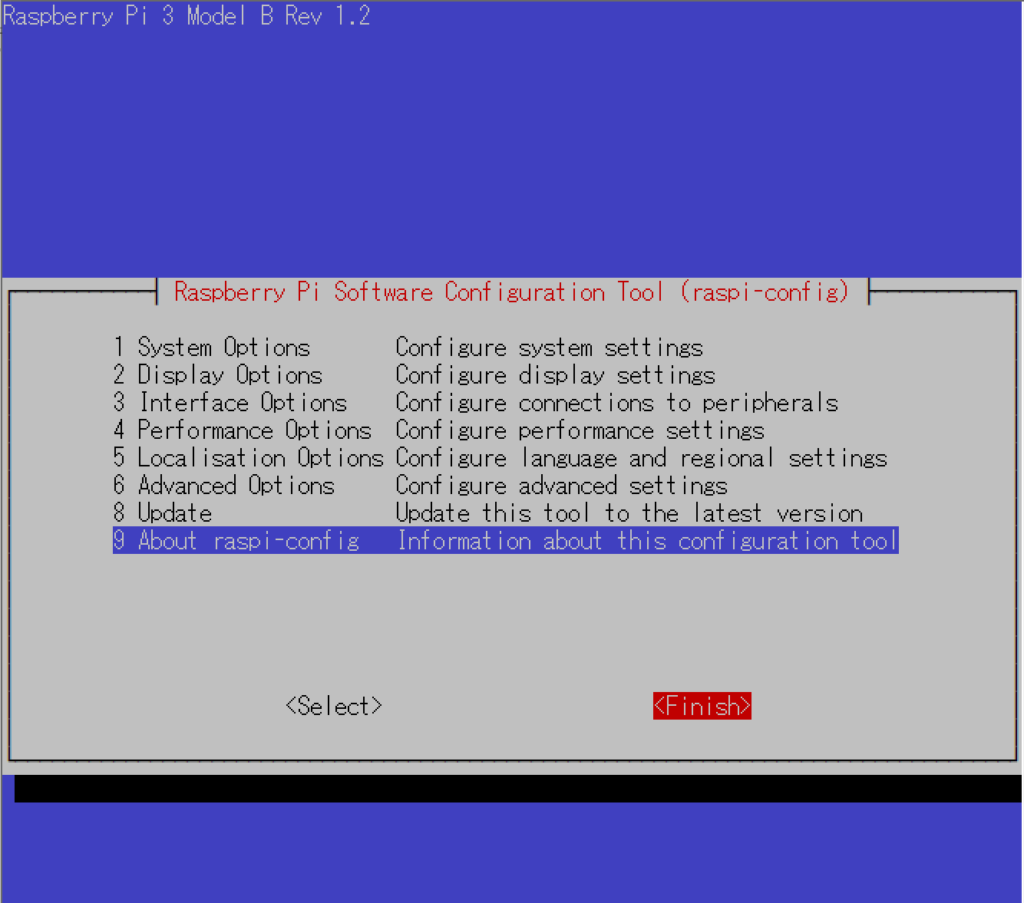
$ sudo raspi-config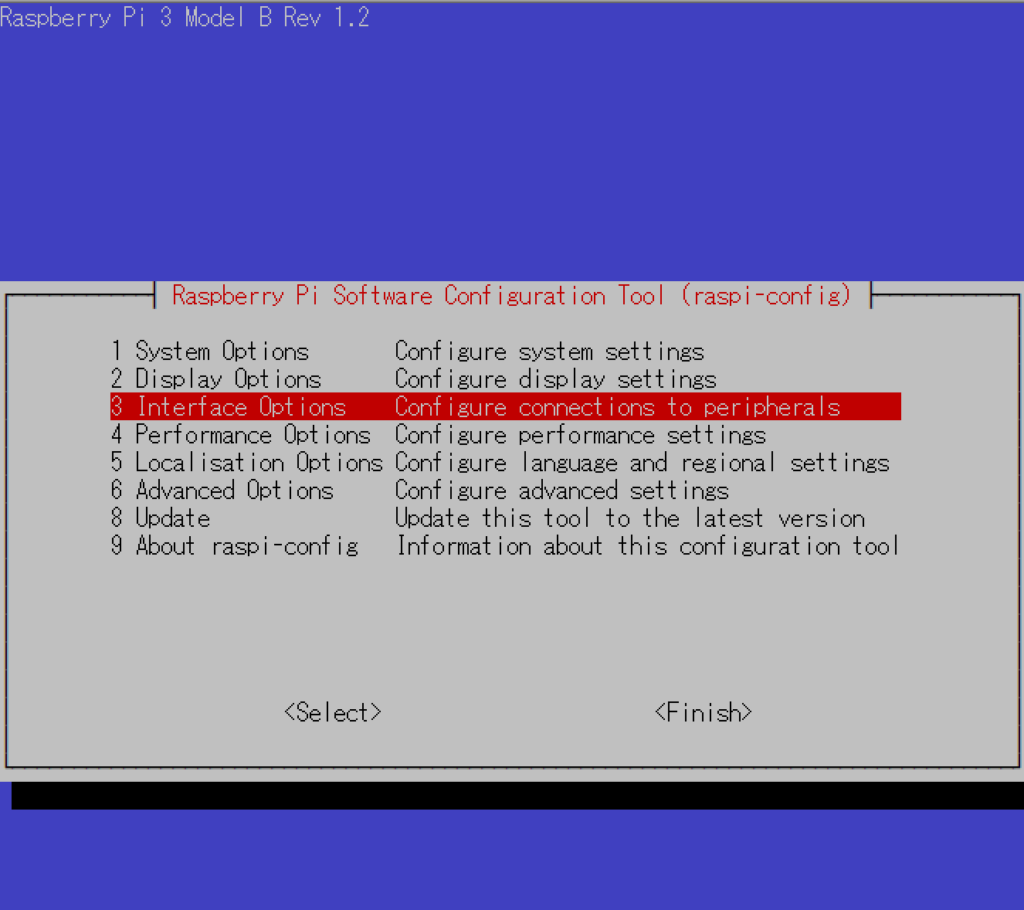
3 Interface Optionsを選択し、Enter
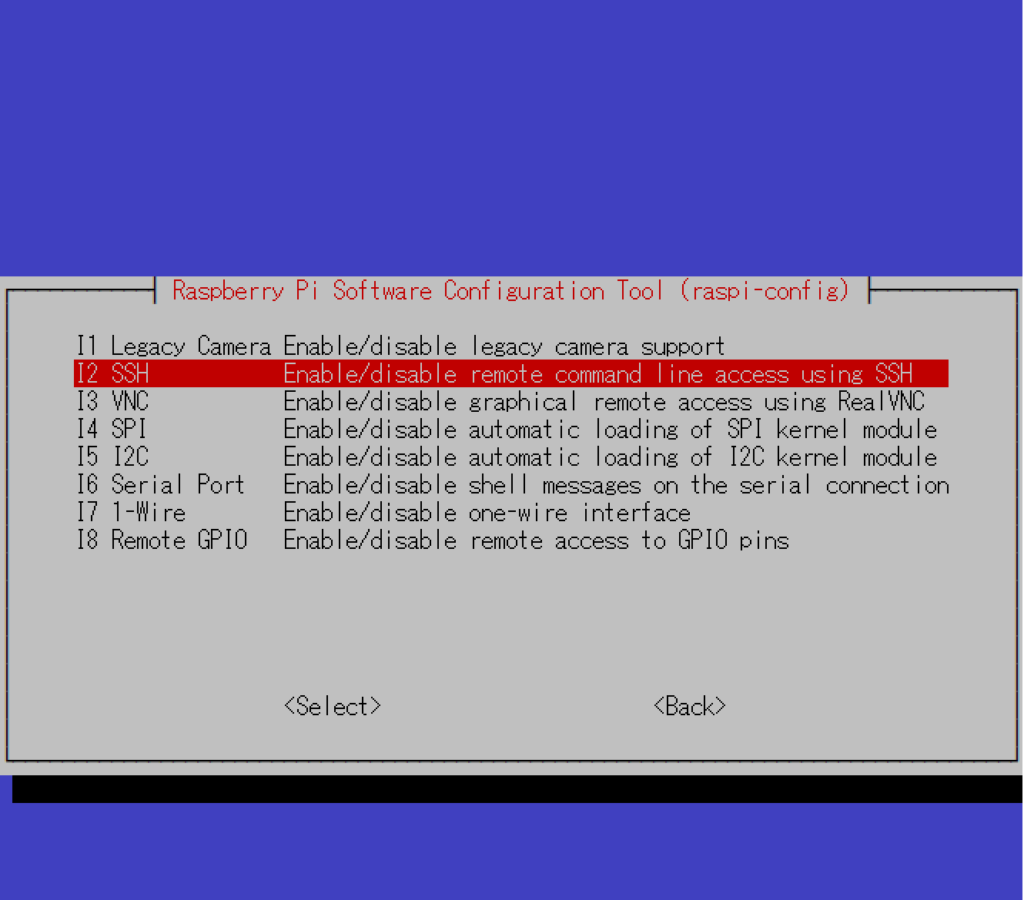
I2 SSHを選択し、Enter
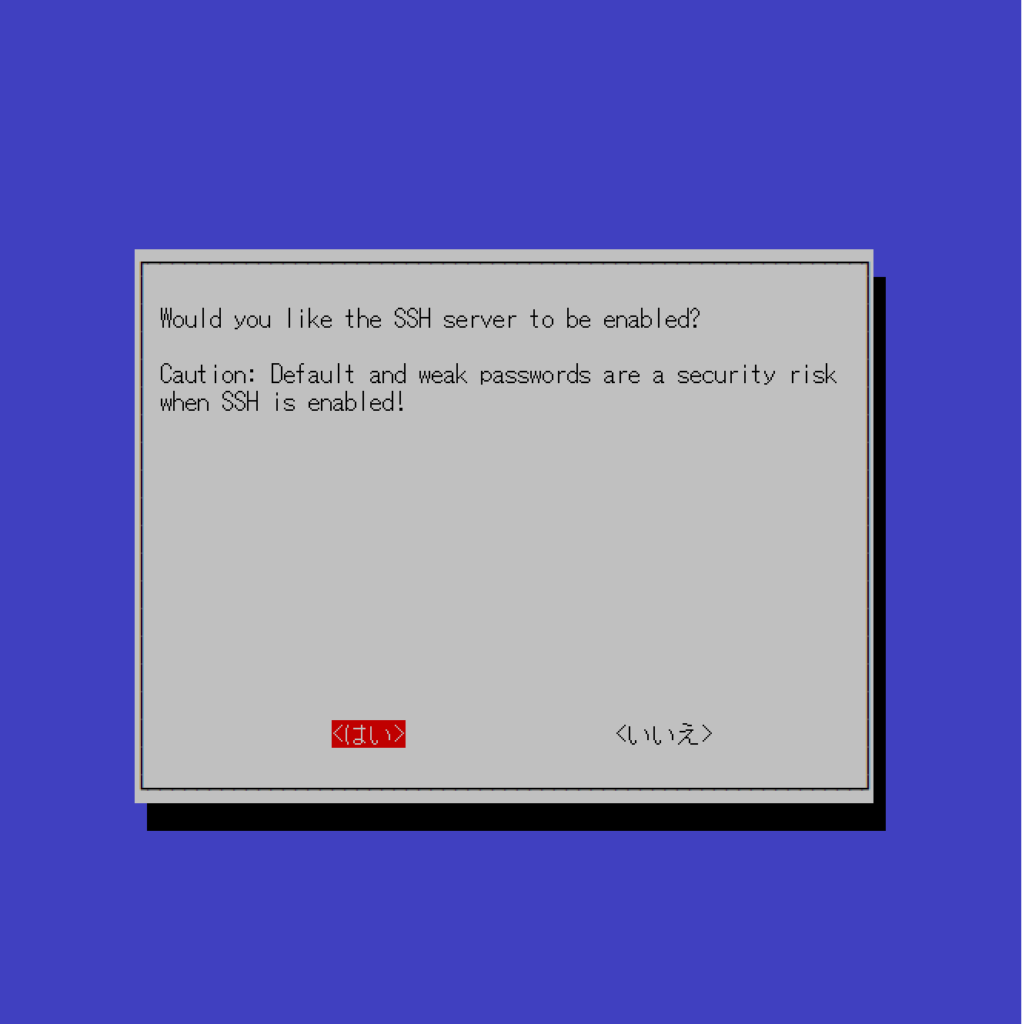
はいを選択し、Enter
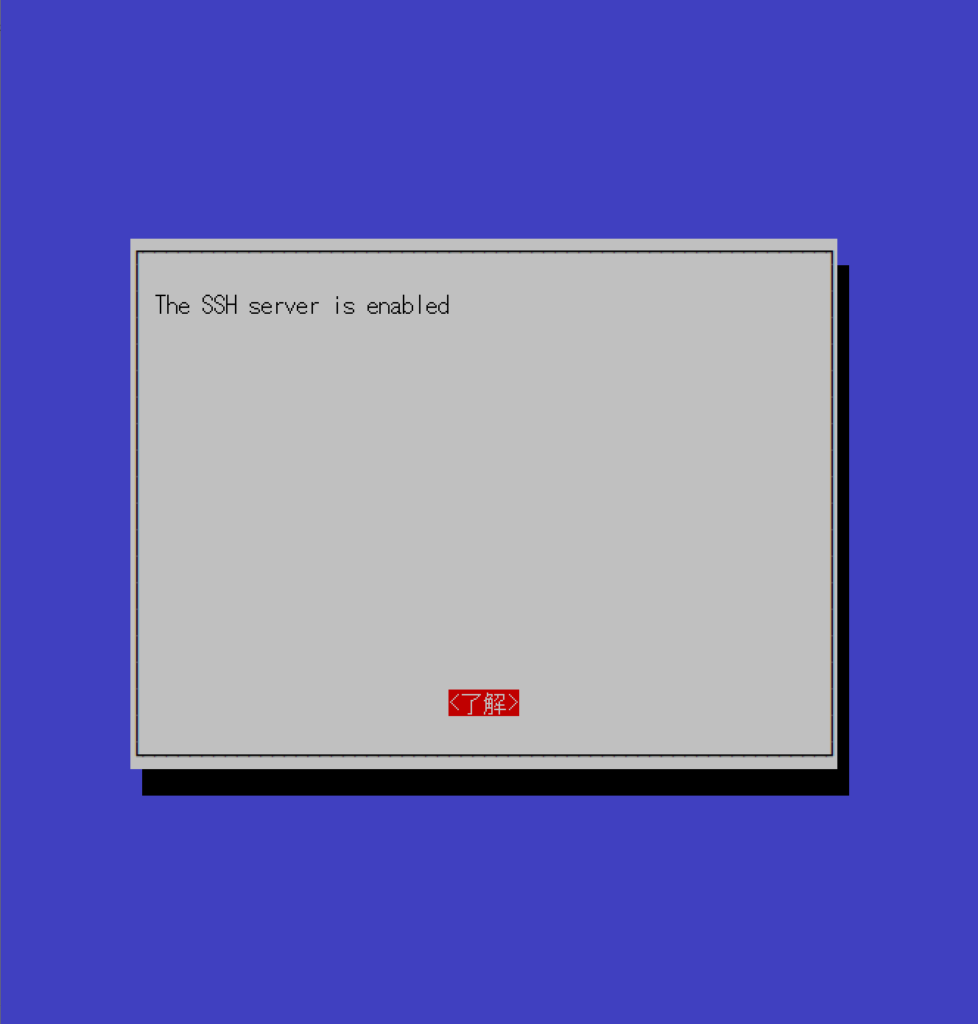
sshが有効となりました。了解を選択し、Enter
Finishを選択し、Enterでraspi-configを閉じる
クライアント側作業
ターミナルを起動し、以下コマンドを実行で、ssh接続完了
$ ssh {ユーザー名}@{IPアドレス}


コメント